Speech balloons in Photoshop in 9 fun-filled steps
Photoshop comes with preset "talk bubbles" with the Custom Shape Tool, but these suck. I'm gonna teach you how to make your own speech balloons instead.
The reason this tutorial is so long is that it includes curved tails. Yeah, curved tails. You'll see what I mean.
Here's my original picture. Sorry for the profanity. Well, I'm not actually sorry.

1) Create a new layer called "fucking speech balloon", and then use the elliptical marquee tool to draw an oval around the text.

2) Now use the pen tool to draw the tail, by clicking to create three points to make a triangle.

3) For both lines from the previous step, click on the center of the line to create a fun little anchor point.
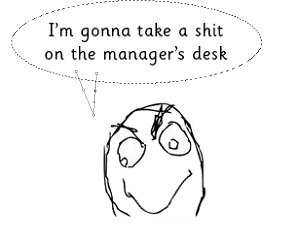
4) Now, while holding the CTRL key, drag the anchor points from the previous step. By doing this, you should be able to turn the boring straight lines into cool curves. Make them lines look funky fresh!

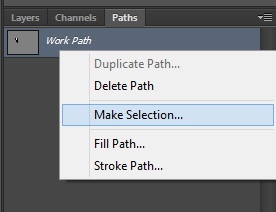
5) Now select the Paths tab (next the the Layers tab). Right click on the Work Path and choose Make Selection.
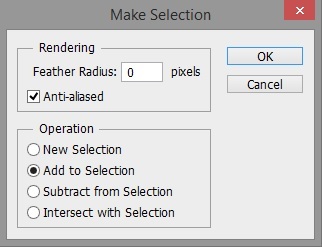
6) In the dialog box that pops up, make sure to choose Add to Selection. Also, set the Feather Radius to zero - yeah, fuck the Feather Radius. Then click OK.
7) Here's what your selection should now look like:
 If it doesn't, then curl up and have a cry.
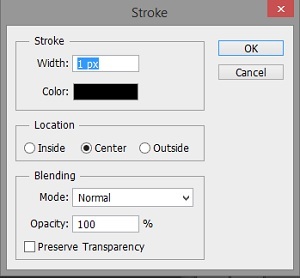
8) Now choose Edit > Stroke from the menu bar. In the dialog box that comes up, choose black for the color. As for the width, you'll have to play around with it to get the result you want. I chose just 1px because my image was already small. Finally, click OK.
9) Press Ctrl + D to erase your selection and view your beautiful creation. At this point you can fill your speech bubble white - but I didn't need to because my background is already white. I'm so clever.



Leave a comment